Building With Spin at Open Source Summit Europe 2022
 Tim McCallum
spin
cms
wasm
webassembly
cloud
rust
bindle
microservices
bartholomew
nomad

This blog post shows you how to install Fermyon’s Spin framework and quickly build applications from templates. Once you have Spin on your system you can build and run fast, secure, and composable microservices with WebAssembly. We hope to get you up and running with Spin in just a few minutes. Did you know Fermyon is attending the Open Source Summit Europe 2022, from the 13th to the 16th of September, in Dublin Ireland? We are in booth S5. We would love you to stop by to ask questions and share your experiences using Spin. Also please note, that you can scan your badge at our booth for your chance to win an Xbox Series X. Good luck, let’s get started.
In this article, we are going to:
- download and install Spin,
- use Spin to create and deploy an application (HTTP request handler) from a template, and
- use Spin to deploy a Content Management System (CMS) from a template.
Clone the Spin Repository
The steps in this article are derived from the official Spin documentation. Therefore, feel free to follow along here as we walk you through the process of building Spin. Though just remember a principle; if in doubt read the docs 😃.
Please note, that there are a few prerequisites along the way. However, you may already have these i.e. Rust and for fresh Linux install users; the standard build toolchain etc.
The first thing we are going to do today is clone Spin from the Spin GitHub repository:
cd ~
git clone https://github.com/fermyon/spin -b v0.5.0
You should now have a new spin directory in your home folder.

NB: Linux Users
If you are on a fresh Linux installation, you will need the standard build toolchain. Running the following commands will prepare the system accordingly:
sudo apt update
sudo apt-get install build-essential libssl-dev pkg-config
Rust Installation
If you don’t already have Rust installed, then the official Rust installation tool is recommended. Below is just an example, for presentation purposes, of how Rust was installed on macOS and Ubuntu Linux:
cd ~
curl https://sh.rustup.rs -sSf | sh
source $HOME/.cargo/env
If you are on a recently released macOS system you may be running the zsh shell. If you are not sure whether your system uses the zsh or the bash shell, you can type env in your terminal. This will print your shell to the screen i.e. SHELL=/bin/zsh or SHELL=/bin/bash.
If the env commands shows that are using the zsh shell, then simply type the following command:
echo 'export PATH="${HOME}/.cargo/bin:${PATH}"' >> ~/.zshrc
source $HOME/.zshrc
Wasi Target
Next, we go ahead and install the wasm32-wasi target. If you would like more details about the WebAssembly System Interface (WASI) there is an official specification and an ‘intro’ document available. To add, simply run this command:
rustup target add wasm32-wasi
Spin Installation
Ensure that you are in the spin directory (the result of the git clone step above.):
cd ~/spin
Cargo (Recommended)
Installing Rust using rustup (as we have shown above) will also install cargo (Rust’s package manager). Installing Spin using cargo is a breeze:
cargo install --locked --path .
Also, the above cargo install will automatically add Spin to your system path. The above command works on Linux, macOS and Windows (and is the recommended way to install Spin).
Make
Another option is to use the make command, as shown below:
make build
The above make command will create a new Spin executable binary file in the release directory i.e. ~/spin/target/release/spin. When using this method you will need to add the spin executable binary to your system path.
Using Spin

At this point, you are now ready to use Spin:
spin --help
The spin --help command from above will produce an output similar to the following:
spin 0.5.0 (b9fedcc 2022-09-02)
The Spin CLI

USAGE:
    spin <SUBCOMMAND>

OPTIONS:
    -h, --help       Print help information
    -V, --version    Print version information

SUBCOMMANDS:
    bindle       Commands for publishing applications as bindles
    build        Build the Spin application
    deploy       Deploy a Spin application
    help         Print this message or the help of the given subcommand(s)
    new          Scaffold a new application or component based on a template
    templates    Commands for working with WebAssembly component templates
    up           Start the Spin application
Congratulations!
Now that we have Spin available, let’s move on to building applications.
Spin Application Templates
Spin has a bunch of application templates that can help you get your applications up and running in no time. To install the already available application templates, simply run the following command:
spin templates install --git https://github.com/fermyon/spin
After the above command has finished, you can use the following command to list the templates which are now available on your system:
spin templates list
The output will look similar to the following:
+---------------------------------------------------+
| Name         Description                          |
+===================================================+
| http-go      HTTP request handler using (Tiny)Go  |
| http-rust    HTTP request handler using Rust      |
| redis-go     Redis message handler using (Tiny)Go |
| redis-rust   Redis message handler using Rust     |
+---------------------------------------------------+
Writing Your Own Templates
If you are interested in writing your own templates, you can follow the existing templates from the Spin repository and the Spin Improvement Proposal (SIP) for templates.
Creating Your Spin Application
Next, we are going to create a Spin application based on the Rust HTTP template. We simply use the spin new command, as shown below:
spin new http-rust spin-hello-world
You will notice that the above command requests input from you; the application creator. Here is an example of how to respond:
Project description: This is an ossummit presentation
HTTP base: /
HTTP path: /hello
The above command builds an application’s directory structure and all of the necessary files, including a spin.toml application configuration file.
To access the application’s directory structure we navigate to the new spin-hello-world directory, which was just created for us:
cd spin-hello-world
If you open the spin.toml file for viewing it will look similar to the following:
spin_version = "1"
authors = ["tpmccallum <tim.mccallum@fermyon.com>"]
description = "This is an ossummit presentation"
name = "spin-hello-world"
trigger = { type = "http", base = "/" }
version = "0.1.0"

[[component]]
id = "spin-hello-world"
source = "target/wasm32-wasi/release/spin_hello_world.wasm"
[component.trigger]
route = "/hello"
[component.build]
command = "cargo build --target wasm32-wasi --release"
Notice the description, base and route values; which we entered, as input, in the previous step?
Building Your Spin Application
Having already installed the Wasi target (in a previous step i.e. rustup target add wasm32-wasi), we can go ahead and build our application using spin:
spin build
Spin build essentially runs the cargo build --target wasm32-wasi --release command.
Running Your Spin Application
The following spin command will run your new application:
spin up
The above command will produce output similar to the following:
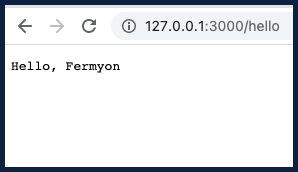
spin-hello-world: http://127.0.0.1:3000/hello
Browsing to that localhost URL will produce the following.

Creating a Content Management System (CMS)
Bartholomew is a lightweight CMS that is powered by WebAssembly.
Did you know, the fermyon.com website you are currently reading is built using both Spin and Bartholomew?
CMS Template
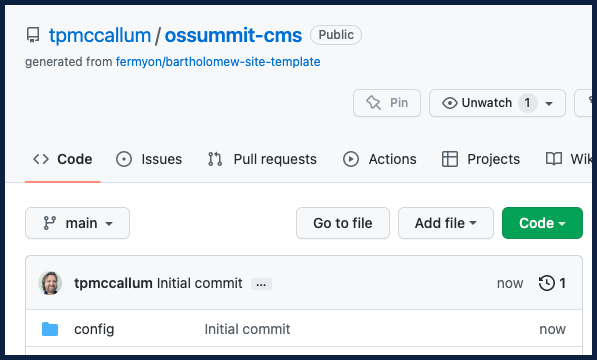
Our team have created a CMS template which allows anyone to simply click the Use this template button which will result in a brand new CMS repository in your GitHub account. The template comes with everything you need to run the CMS immediately.

Spin Up Your CMS
To run your CMS just click on the green “Code” button and then clone your new repository (that was created in the previous step):

git clone <your-github-account> <your-repo-name>
Now change into the newly created directory:
cd <your-repo-name>
Then, use the spin command to spin up your new CMS:
spin up
The output from the above command will look similar to the following:
~/bartholomew-site-template$ spin up
Preparing Wasm modules is taking a few seconds...

Serving http://127.0.0.1:3000
Available Routes:
  bartholomew: http://127.0.0.1:3000 (wildcard)
  fileserver: http://127.0.0.1:3000/static (wildcard)
As shown in the command line interface above, your site will now be available on port 3000 via localhost.

Want to Know More?
If you are attending the Open Source Summit Europe 2022 and have any questions, please stop by our booth.

There are a few other ways to get in touch, see the Fermyon contact details section below. Thanks for reading.
Fermyon Contact Details
We would love to hear what you are building and also help you out to ensure that you create Wasm applications beyond your wildest dreams.

Discord:
We have a great Discord presence. Please join us in Discord and ask questions and share your experiences with Fermyon products like Spin.
Twitter:
Following and subscribing to our Twitter is a great way to keep in touch.
GitHub:
We can be reached via GitHub.
Email:
Please feel free to Email us.
Become an Insider
If you would like to “Become an Insider”, please fill out this brief form to get early access, deeper insights and other insider invitations.
We Are Hiring
We have several job openings available in areas of training, software engineering, developer relations, community management and more.