How I Built a Like Button for My Blog with Spin
 Caleb Schoepp
spin
js
ts
key/value
Hi, my name is Caleb and a few months ago I joined Fermyon as a software engineer. During my first few weeks on the job I was eager to kick the tires on our open source project Spin. I decided that I was going to build a simple and persistent like button for my blog with Spin. In this post I’m going to walk you through how I built it. Along the way we’ll see two of my favorite Spin features in action: the JavaScript router and the key/value store.
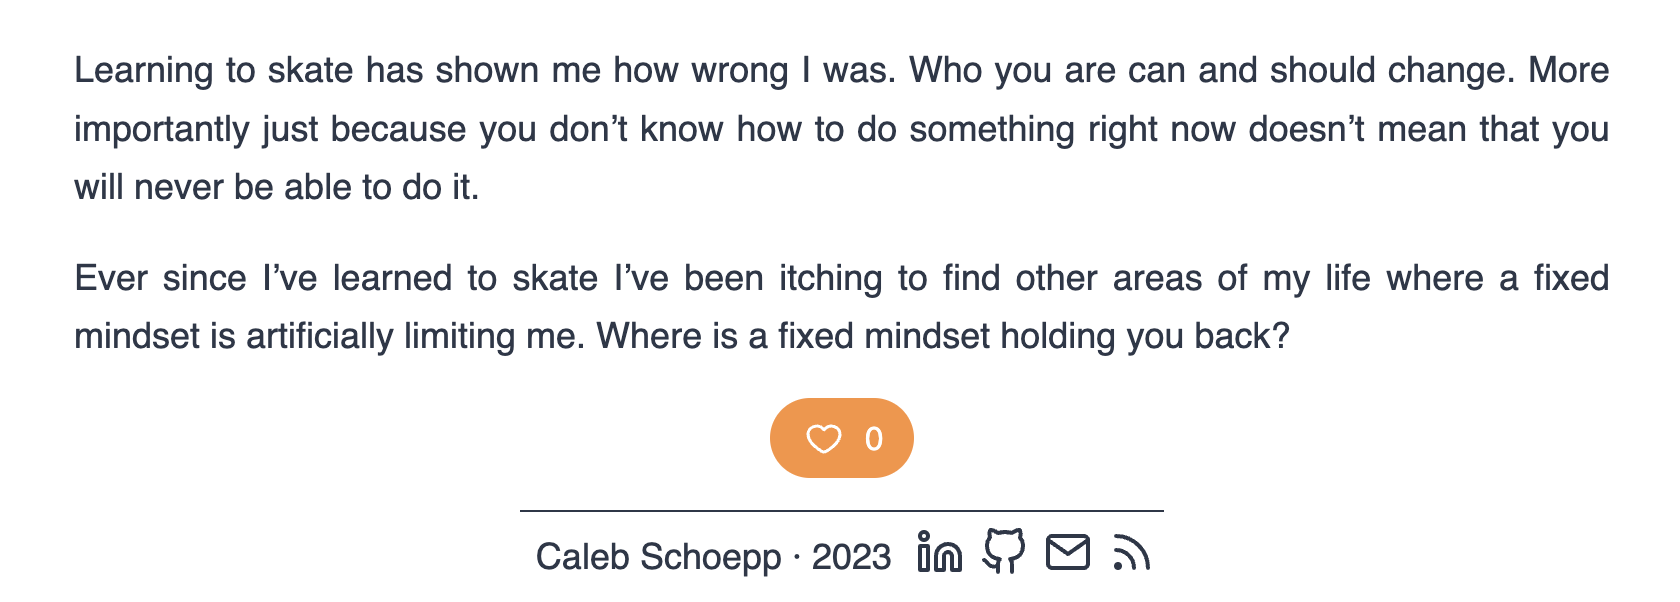
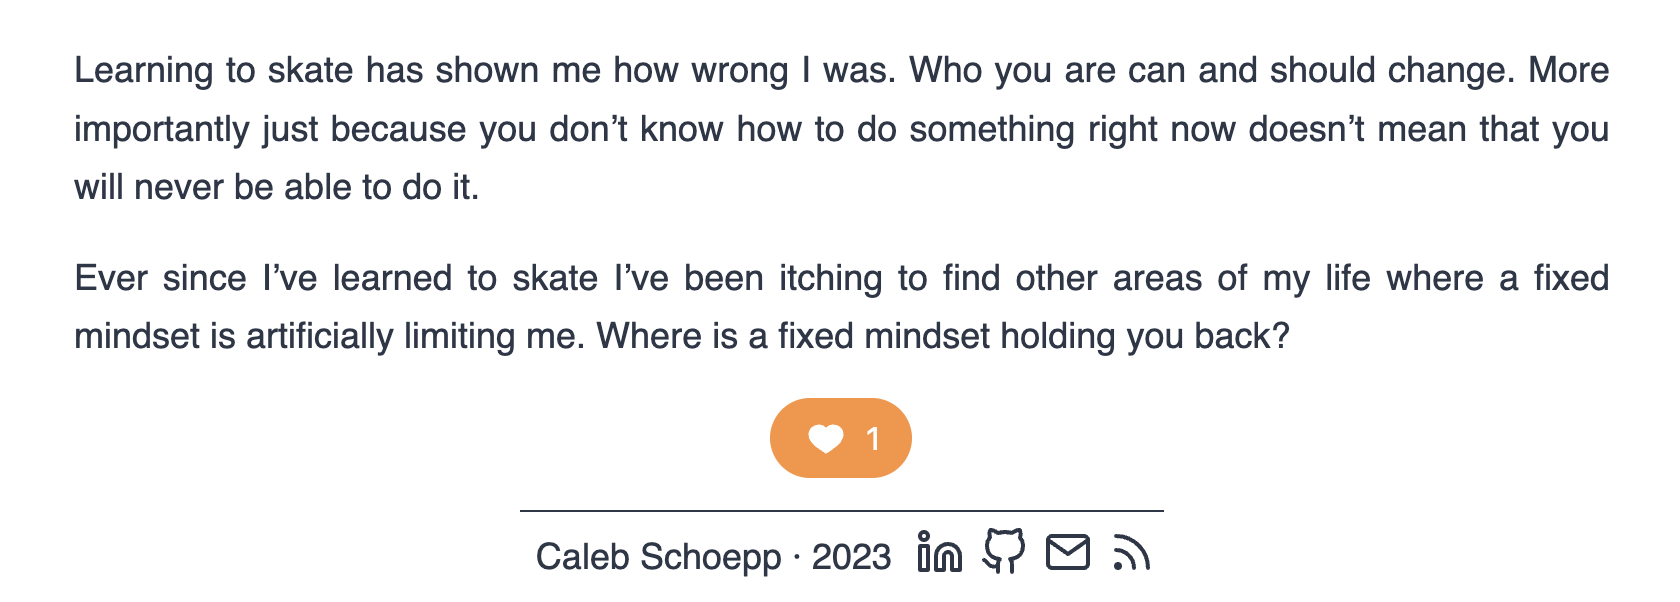
Before we start looking at how I built this like button, I wanted to show you the project in action. Here’s what the like button looks like on my blog.
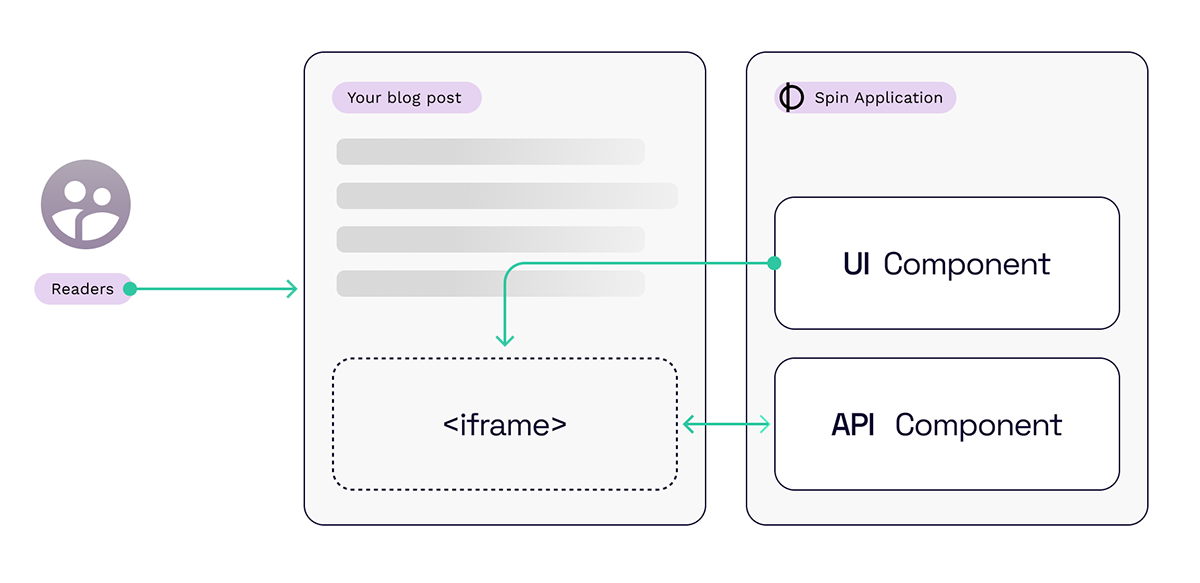
Integrating the like button with my blog was as easy as adding a short HTML snippet to each blog post. The iframe loads a like button that is served by the Spin application. Because I used a different key for each post (more on this later), each post has its own unique like count. Note that my blog uses Hugo so {{ .Page.RelPermalink }} will automatically resolve to the URL for each blog post. Also note that I would replace http://localhost:3000 with a Fermyon Cloud URl when I’m not just testing locally.
<iframe
  style="width: 72px; height: 40px; margin: 0; padding: 0; border: none"
  src="http://localhost:3000/static/likebutton.html?key={{ .Page.RelPermalink }}"
  title="Like Button"
></iframe>
With the help of browser local storage the like button also makes sure that readers can only like each post once — this is indicated by a full heart. Sorry super-fans, I guess you’ll have to resort to some other method of showing your appreciation after that first like.
Architecture Overview
Now that we’ve seen the like button in action let’s go over how I built it using Spin. The application consists of two components: a UI component that serves the like button itself and an API component that handles persisting the likes.
Having spent some time to understand the big picture, I think that it’s time we dive into the details. As you follow along if you ever want to see more of the code you can find it on my Github.
If you haven’t ever used Spin before than I recommend you go read our fantastic quickstart guide. We’ll be skipping some of the basics here. Once you’ve given that a read c’mon back here and we can continue.
The API Component
I chose to write the API in TypeScript and used the spin new command to scaffold it out. Let’s take a look at the component’s configuration found in spin.toml. There are two key lines we should pay attention to.
[[component]]
id = "api"
source = "target/spin-http-js.wasm"
exclude_files = ["**/node_modules"]
key_value_stores = ["default"]
[component.trigger]
route = "/api/..."
[component.build]
command = "npm run build"
key_value_stores = ["default"] gives the component access to a key/value store named default. This is where we’ll be storing the like counts. The key/value store is an incredibly easy way persist data and since it is built in it saves us from the effort of provisioning an instance of Redis or Postgres.
route = "/api/..." tells the component to accept any HTTP request that comes in with the prefix /api/. This helps us distinguish requests for the UI from requests for the API.
The API all lives in src/index.ts and configuring it is very simple. The only thing you need to do is export an asynchronous function called handleRequest that handles any incoming HTTP requests. Using the recently released JavaScript router it is trivial to map incoming requests to the correct business logic.
// Entrypoint to the Spin handler.
export async function handleRequest(
request: HttpRequest
): Promise<HttpResponse> {
  return await router.handle(
    {
      method: request.method,
      url: request.uri,
    },
    { body: request.body }
  );
}
Speaking of incoming requests, the API supports fetching the like count of a post and incrementing the like count of a post. To fetch the like count you can make a GET request to the /api/* endpoint. Whatever you pass in the wildcard portion of the url is the key of the post you are querying. For example GET /api/post-1 would fetch the like count for your blog post post-1. The handler checks the key/value store to see if the key exists. If it does it returns the like count and otherwise it returns 0. Here is what the handler for this endpoint looks like.
// Return the count of likes for a post e.g. GET /api/your/post/url/goes/here
router.get("/api/*", async (req): Promise<HttpResponse> => {
  console.log(`GET ${req.url}`);

  // Prepare the KV store and the key we'll use
  let kv = spinSdk.kv.open(KV_STORE);
  let key = req.url.replace(/\/api/, "");

  // Get the number of likes for the post or if it doesn't exist default to 0
  let likes = 0;
  if (kv.exists(key)) {
    likes = Number(decoder.decode(kv.get(key)));
  }

  return {
    status: 200,
    body: encoder.encode(JSON.stringify({ post: key, likes } as Result)),
  };
});
To increment the like count of a post you can make a POST request to the same /api/* endpoint. Again the wildcard portion is your post key. The handler searches the key/value store for the previous like count of the given key (defaulting to 0), increments this value by one, and then writes it back to the key/value store.
// Increment the count of likes for a post e.g. POST /api/your/post/url/goes/here
router.post("/api/*", async (req): Promise<HttpResponse> => {
  console.log(`POST ${req.url}`);

  // Prepare the KV store and the key we'll use
  let kv = spinSdk.kv.open(KV_STORE);
  let key = req.url.replace(/\/api/, "");

  // Get the number of likes for the post or if it doesn't exist default to 0
  let likesBefore = 0;
  if (kv.exists(key)) {
    likesBefore = Number(decoder.decode(kv.get(key)));
  }

  // Increment the post's likes by 1
  let likesAfter = likesBefore + 1;
  kv.set(key, likesAfter.toString());

  return {
    status: 200,
    body: encoder.encode(
      JSON.stringify({ post: key, likes: likesAfter } as Result)
    ),
  };
});
Both of the endpoints return the same Result JSON which includes the post key and the like count. This is what the UI uses to know how many likes to display.
That’s about all there is to say about the API. Pretty simple right?
The UI Component
The job of the UI is to serve up the actual HTML/CSS/JavaScript for the like button. This means that all you need is an iframe on your blog to include the like button as opposed to including all of these assets in your blog. The tool best suited for this job is the Spin Fileserver. This is a pre-compiled spin component that allows you to easily serve static assets. Let’s take a look at the component’s configuration in spin.toml. This time we need to pay attention to three lines.
[[component]]
source = { url = "https://github.com/fermyon/spin-fileserver/releases/download/v0.0.1/spin_static_fs.wasm", digest = "sha256:650376c33a0756b1a52cad7ca670f1126391b79050df0321407da9c741d32375" }
id = "ui"
files = [ { source = "assets", destination = "/" } ]
[component.trigger]
route = "/static/..."
source = { url = "...", digest = "..." } is how we link to the precompiled Spin Fileserver rather than some of our own code.
route = "/static/..." tells the component to accept any HTTP request that comes in with the prefix /static/. Once again this is to distinguish requests for the UI from requests for the API.
files = [ { source = "assets", destination = "/" } ] mounts any files found in the assets/ directory on our machine inside the web assembly module at the / directory.
In practice these three pieces of configuration mean that a request like GET /static/likebutton.html would return a file found at assets/likebutton.html.
The primary static asset the UI serves is likebutton.html. This is what the iframe on a blog post requests to display. The HTML renders the like button, styles it with Tailwind CSS, and imports likebutton.js.
<!DOCTYPE html>
<html>
  <head>
    <meta charset="UTF-8" />
    <meta name="viewport" content="width=device-width, initial-scale=1.0" />
    <script src="https://cdn.tailwindcss.com"></script>
    <script src="likebutton.js"></script>
  </head>
  <body>
    <button
      type="button"
      class="flex items-center justify-center h-10 gap-2 overflow-hidden text-white transition-transform bg-orange-400 rounded-full like-button hover:cursor-default active:scale-95"
      onClick="clickLikeButton()"
    >
      <div
        class="relative w-full h-full overflow-hidden flex items-center justify-center gap-2 px-4"
      >
        <img src="emptyheart.svg" id="empty-heart" class="block" />
        <img src="fullheart.svg" id="full-heart" class="hidden" />
        <span class="inline-flex" id="like-count"></span>
      </div>
    </button>
  </body>
</html>
likebutton.js provides the dynamic functionality for the like button. The onLoad() function is called when the page loads. It talks to the API and sets the initial like count. It also checks to see if the user has already liked the post (this information is stored in the browser local storage) and if they have it fills in the heart and prevents them from re-liking the post. The helper function definitions have been omitted to keep the code snippets reasonably sized.
// Called when the page loads to properly initialize the like button
function onLoad() {
  getAndSetLikeCount();

  if (hasAlreadyLikedPost()) {
    fillHeart();
  }
}
The clickLikeButton() function is called when the user clicks on the like button. If the user has already liked the blog post nothing happens. Otherwise it calls out to the API to increment the like count, records the like in browser local storage and fills in the heart.
// Called when the like button is clicked to record the like
function clickLikeButton() {
  if (!hasAlreadyLikedPost()) {
    incrementLikeCount();
    recordLikeInLocalStorage();
    fillHeart();
  }
}
Now you know everything there is to know about the UI. With the API and UI working together it is simple to add a persistent like button to your blog.
All Done
We should discuss a limitation of this application before we finish here. The limitation is that there is no guarantee that a user can only like a post once. It’s true that we use the browser local storage to track if a user has already liked a post and then stop them from doing it again. However, the API endpoints are publicly available without any authentication and thus a user could manually get around this limitation. For example any super-fans who just can’t get enough of my writing could just keep manually making requests against POST /api/post-they-like.
In this post we went over how you can build a simple and persistent like button using Spin. We also got to see the JavaScript router and key/value store in action. If you enjoyed following along I recommend you check out the code and try running it yourself.